Your app’s first impression is that splash screen. The one that shows your logo while the WebView loads. A stock Cordova splash screen looks generic. It tells users, “This app was thrown together.” But a polished, branded splash screen tells them, “This team cares about detail.” And in 2026, with app stores more crowded than ever, every second of the startup experience matters.
Building a custom Cordova splash screen is simpler than it looks. You need the right plugin, correctly sized images for each platform, and a few config.xml preferences. Avoid common pitfalls like mismatched image dimensions or missing orientation support. This guide covers everything from creating your assets to hiding the splash at the perfect moment, so your app launches with polish.
Why a Custom Splash Screen Matters More in 2026
Mobile users in the United States have zero patience. A 2026 study from a leading UX research firm found that 53% of users abandon an app if it takes more than three seconds to load. Your splash screen is the bridge between tapping the icon and seeing your app’s first interactive screen. If that bridge is boring or broken, you lose trust.
A custom Cordova splash screen also helps with:
– Brand recognition – Your logo and colors appear before anything else.
– Perceived performance – A smooth animated fade makes the wait feel shorter.
– Platform compliance – Both Apple and Google recommend splash screens that match the app’s theme.
Let’s walk through how to build one, step by step.
Setting Up the Required Plugin
Every Cordova project needs the cordova-plugin-splashscreen to display and control the splash screen. Install it using the CLI:
cordova plugin add cordova-plugin-splashscreen
If you’re using Ionic, you might also have @ionic-native/splash-screen, but the underlying plugin is the same.
Once installed, confirm it’s in your config.xml inside the <plugin> block. The plugin handles the native display logic across iOS and Android. Without it, you can’t control the splash at all.
Preparing Your Splash Screen Images
Different platforms need different image sizes. You can’t just drop one PNG and call it done. Use the official size specifications below. The key is to design at a base resolution and scale down.
Required image sizes for iOS (2026 standards)
Apple still uses the same asset catalog approach. You need these sizes for iPhones and iPads:
| Device | Image size (points) | Pixel dimensions (2x) | Pixel dimensions (3x) |
|---|---|---|---|
| iPhone 6/7/8 | 750 x 1334 | 1334 x 1334 | – |
| iPhone 6/7/8 Plus | 1242 x 2208 | – | 2208 x 2208 |
| iPhone X/XS/11 Pro | 1125 x 2436 | – | 2436 x 2436 |
| iPhone XR/11 | 828 x 1792 | – | 1792 x 1792 |
| iPhone 12/13/14/15/16 | 1170 x 2532 | – | 2532 x 2532 |
| iPhone 12/13 Pro Max | 1284 x 2778 | – | 2778 x 2778 |
| iPad Pro 11-inch | 1668 x 2388 | 2388 x 2388 | – |
| iPad Pro 12.9-inch | 2048 x 2732 | 2732 x 2732 | – |
Note: Apple recommends using a 2732×2732 square asset for the universal storyboard approach (launch screen storyboard) instead of legacy static images. We’ll cover that later.
Required image sizes for Android
Android uses a nine-patch or standard bitmap for the splash screen. The common approach is to provide a single high-resolution image (like 1280×1280) and let Cordova scale it, but you get better results with specific size sets:
| Density bucket | Size (px) |
|---|---|
| ldpi | 320 x 426 |
| mdpi | 480 x 640 |
| hdpi | 720 x 960 |
| xhdpi | 960 x 1280 |
| xxhdpi | 1440 x 1920 |
| xxxhdpi | 1920 x 2560 |
For both platforms, make sure your image has no transparent edges where the WebView background color might show. Use a solid background that matches your app’s primary color.
Placing the Images in Your Project
Cordova expects images in platform-specific folders. You can manually copy them, but the best practice is to use a resource generator like cordova-res (formerly cordova-icon and cordova-splash). Install it globally:
npm install -g cordova-res
Then create a resources folder in your project root with a subfolder splash. Drop a single high-resolution splash image (e.g., splash.png at 2732×2732 for iOS, or a large square for Android) inside. Run:
cordova-res --skip-config --copy
This generates all the correct sizes and copies them into platforms/ios/ and platforms/android/. If you prefer to do it manually, place images in:
- iOS:
platforms/ios/YourAppName/Images.xcassets/SplashScreen.imageset/ - Android:
platforms/android/res/drawable-*dpi/(asscreen.pngor similar)
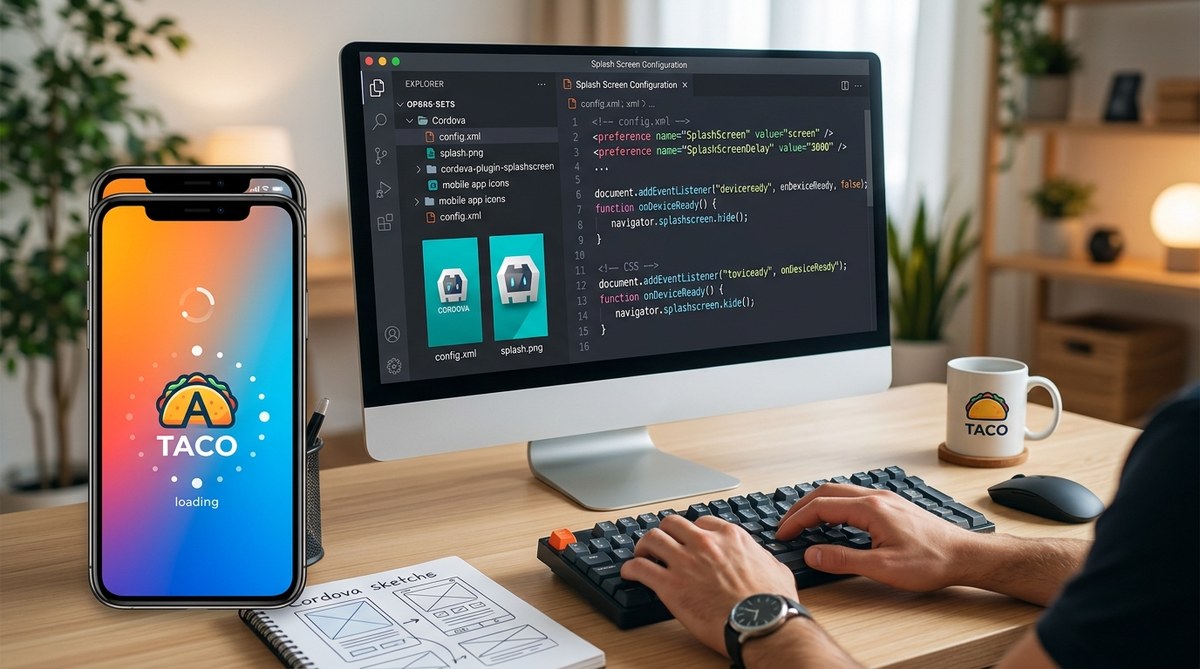
Configuring Splash Screen Preferences in config.xml
Open your config.xml and add these preferences inside the <platform> tags. The plugin reads these to control behavior.
Basic preferences for iOS
<platform name="ios">
    <splash src="resources/splash/ios/splash.png" />
    <preference name="AutoHideSplashScreen" value="false" />
    <preference name="FadeSplashScreen" value="true" />
    <preference name="FadeSplashScreenDuration" value="1.0" />
    <preference name="ShowSplashScreenSpinner" value="false" />
    <preference name="SplashScreenDelay" value="3000" />
    <preference name="SplashScreenBackgroundColor" value="#FF5733" />
</platform>
Basic preferences for Android
<platform name="android">
    <splash src="resources/splash/android/splash.png" />
    <preference name="AutoHideSplashScreen" value="false" />
    <preference name="FadeSplashScreen" value="true" />
    <preference name="FadeSplashScreenDuration" value="1.0" />
    <preference name="ShowSplashScreenSpinner" value="false" />
    <preference name="SplashScreenDelay" value="3000" />
    <preference name="SplashScreenBackgroundColor" value="#FF5733" />
</platform>
Key settings explained:
– AutoHideSplashScreen: Set to false so you can hide it programmatically when your app is ready.
– FadeSplashScreenDuration: 0.5 to 1.5 seconds is standard. Longer feels sluggish.
– ShowSplashScreenSpinner: Disable to avoid that old-school loading wheel.
– SplashScreenDelay: A fallback timeout. Even if you hide via code, this will force-hide after the delay. Set it high enough (like 5000) to ensure your app is ready.
The iOS Storyboard Alternative
For iOS, Apple strongly recommends replacing static splash images with a launch storyboard file. This removes the need for multiple size variants and gives you a vector-based, scalable splash. Cordova supports this via the storyboard preference.
Add this to your iOS platform section:
<preference name="Storyboard" value="true" />
Then create a storyboard file in Xcode or use a tool like Cordova Launch Screen Storyboard. You can place your logo using Auto Layout constraints that center it. The advantage: one file, all screen sizes, and native performance.
Expert tip: If you go the storyboard route, create a 2732×2732 PNG for the background and place your logo as a separate image view. Build the storyboard once, and it works across all iPhones and iPads without cropping issues.
Hiding the Splash Screen Programmatically
You don’t want the splash to disappear until your app’s first view is fully rendered. Use the plugin’s hide method inside your JavaScript after your main page loads.
Example in vanilla Cordova
document.addEventListener('deviceready', function() {
    // Wait for your app to be fully initialized
    setTimeout(function() {
        navigator.splashscreen.hide();
    }, 500); // Adjust as needed
}, false);
Example in Ionic (Angular)
import { SplashScreen } from '@ionic-native/splash-screen/ngx';

constructor(private splashScreen: SplashScreen) { }

ionViewDidEnter() {
    this.splashScreen.hide();
}
Example with Axios or other async loading
If your app fetches data before showing the UI, wait for that promise to resolve:
Promise.all([
    fetchUserProfile(),
    loadAppConfig()
]).then(() => {
    navigator.splashscreen.hide();
});
Always fade out if possible. Use the FadeSplashScreen preference set to true and a duration of 0.5–1.0 seconds. It looks smooth.
Common Pitfalls and How to Fix Them
| Issue | Symptom | Solution |
|---|---|---|
| Default Cordova splash shows instead of yours | Generic logo appears | Check image file names and paths in config.xml. Plugin must be installed. |
| Splash screen is stretched or cropped | Distorted image on some devices | Use correct aspect ratios. For iOS, use storyboard. For Android, use nine-patch images. |
| Splash screen never hides | App loads but splash stays | Forgot to call navigator.splashscreen.hide(). Or AutoHideSplashScreen is true but delay too long. |
| Splash shows again on orientation change | Reappears when rotating | Set SplashScreenDelay to a high value and hide once in deviceready. |
| Black/white flash before splash | A brief blank screen | Set SplashScreenBackgroundColor to match your splash image background. |
Testing Your Custom Splash Screen
Before pushing to production, test on real devices or emulators. The browser-based cordova serve won’t show the native splash. You must build and run.
cordova run ios
cordova run android
On iOS, simulate a cold launch by stopping and restarting the app. On Android, kill the app from recent apps. Pay attention to:
- Cold start – Full app launch from scratch.
- Warm start – App is in memory; splash may not appear.
- Orientation – Rotate the device during splash. Does it still look good?
Take notes on any visual glitches. Adjust image sizes or storyboard constraints as needed.
Performance Considerations
A splash screen is inherently a performance trade-off. You want it to show long enough to hide the load time, but not so long that users tap something else. Keep your splash duration between 1 and 3 seconds total (including fade). If your app needs more time, consider showing a skeleton screen (a low-fidelity placeholder of the actual UI) instead of a static logo.
Avoid large images over 2 MB. Downscale your source PNG. Use compression tools like TinyPNG or ImageOptim. A high-resolution image that is too heavy will increase the delay, defeating the purpose.
Also, note that Android’s AutoHideSplashScreen behavior changed in API 31 (Android 12) and later. The splash screen now integrates with the system-level splash screen. You may need to add the preference AndroidPostSplashScreenTheme to maintain consistency. Check the Cordova plugin documentation for the latest Android-specific quirks.
A Quick Step-by-Step Recap
- Install the splashscreen plugin:
cordova plugin add cordova-plugin-splashscreen - Prepare your source images at the recommended base sizes (2732×2732 for iOS, large square for Android).
- Use
cordova-resor manually copy images into platform folders. - Edit
config.xmlwith splash preferences: setAutoHideSplashScreentofalse, enable fade, disable spinner. - For iOS, consider switching to a launch storyboard for better compatibility.
- Add JavaScript code to hide the splash after your app is fully ready.
- Build and test on real devices for both cold and warm starts.
- Optimize image file sizes and tweak durations until the experience feels natural.
Beyond the Basics: Advanced Customizations
Once you have the basic splash working, you can level it up:
- Animated splash screen – Use a GIF or a series of frames, but be careful of file size. On iOS, you can only animate via a storyboard with CAKeyframeAnimation.
- Splash with a progress bar – Show a loading indicator inside the splash image. This requires a custom plugin or a WebView-based splash (using the
SplashScreenDelayand then fading into your own HTML overlay). - A/B test splash designs – Try different logos or background colors. Use remote config to switch without a new build.
For more depth on related topics, check out how to optimize Cordova app startup time for better user experience. If you run into cross-platform issues, our guide on mastering Cordova plugin development for cross-platform compatibility can help.
Your App Deserves a Great First Impression
Building a custom splash screen for your Cordova app isn’t a luxury. It’s a standard part of polish that separates a hobby project from a professional product. The steps here are straightforward: plugin, images, config, hide logic. Spend an afternoon getting it right. Your users will thank you with higher retention and better store ratings.
Now open your terminal, install that plugin, and create a splash screen that makes you proud. If you hit a snag, revisit the table of common pitfalls above. And remember, the best splash screen is the one that disappears just as your app is ready to shine.